A USEFUL HANDMADE PROJECT
Make a Paper Pop-Up Step Card
A reversed cut-and-fold step lifts one geometric shape when the card opens and folds it away when closed.
Start with your materials ↓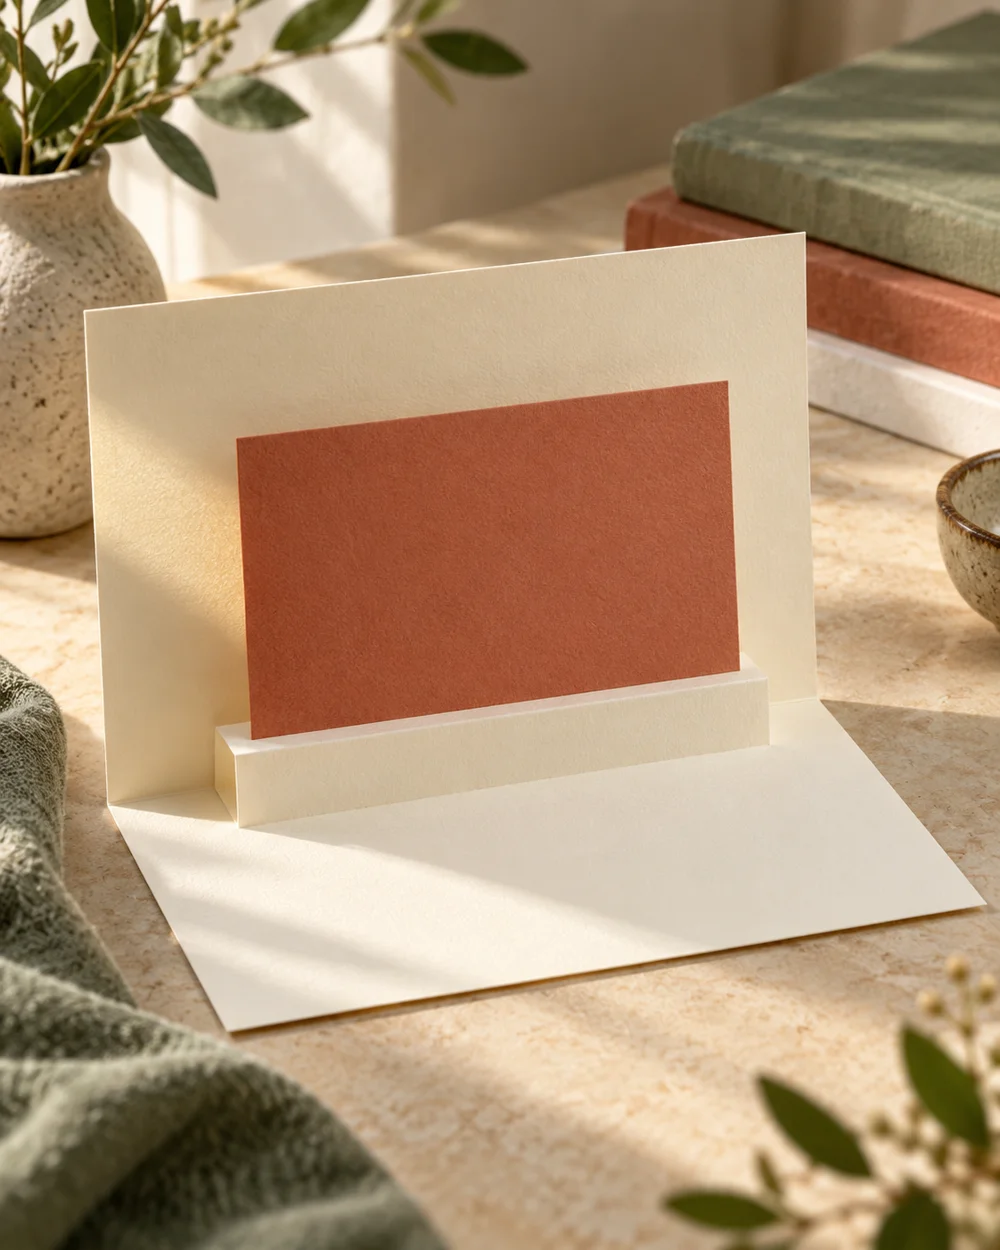
WHAT TO GATHER
Your starting kit.
- Plain paper or cardstock suited to the folds described below
- A ruler, pencil, and scissors
- Paper glue and scrap paper for protecting the work surface
- A blunt folding tool for scored creases
STEP 01
Measure and prepare
Fold a 150 by 200 mm sheet in half. On its folded edge mark two parallel cuts 30 mm apart and 20 mm deep.
STEP 02
Lay out the construction
Cut through both layers on the marks. Open the sheet and reverse the cut section inward to make a step across the center fold.
STEP 03
Join and shape
Glue a lightweight paper rectangle to the vertical step face without bridging its fold. Mount inside a larger folded card, leaving the moving step unglued.
STEP 04
Check the result
Close slowly before the glue sets and check that the raised piece remains inside the folded edges. Let glued joints dry according to the adhesive instructions. Compare the finished shape with its intended use: moving parts should move freely, open pockets should remain open, and supporting folds should sit level. Trim only a little at a time if a paper edge catches.
STEP 05
Finish and keep
Remove temporary pencil guides with a clean eraser where the paper allows it. Store the finished piece somewhere dry and avoid putting pressure on raised or rolled details. Keep your first scrap-paper version nearby if you want to change the dimensions next time.
Before you begin.
Can I change the paper size?
Yes. Make a scrap version first and keep the same fold sequence. Where a piece wraps another object, measure the actual object and add space for its thickness instead of enlarging only one dimension.
What should I check before beginning?
Close slowly before the glue sets and check that the raised piece remains inside the folded edges.
Original editorial project guidance. Images are AI-generated concepts, not photographs of tested finished projects. Practice on inexpensive materials and follow tool and material instructions. Sources & approach.
Save to Pinterest ↗KEEP THE THREAD GOING